| How to Write with Cricut and Cut in One Step! | 您所在的位置:网站首页 › cut out doing something › How to Write with Cricut and Cut in One Step! |
How to Write with Cricut and Cut in One Step!
|
Facebook
Email
Print
Jump to Craft
Need Cricut Design Space help?? In this 5th video of the Cricut Design Space 101 series, you will learn how to use the write and cut function. We are moving right along to part 5 in our How to Use Cricut Design Space series. Today we will be learning about the write and cut function on your Cricut machine. This is a great way to make gift tags or invitations. However, one of the downsides of using the write function in CDS, is that it only will write the outline of the letters as it does with the engraving tool and foil transfer kit. You can use the Cricut draw and cut function on all of the Cricut machines, including the Cricut Explore Air 2, the Cricut Maker, and the Cricut Joy! So let’s talk about how to draw and cut on Cricut, plus I have a great tip for you on how to get it to write thick letters and have also added how to change from cut to draw on the Cricut app! 
Last year I made some snowy mason jar centerpieces with bible verses on the paper holly for a church event. This was one of the first times I used the write and cut function and I loved how they came out. 
Cricut design space has changed some things since then so I wanted to make a new video on how to write with the Cricut at the bottom of the post(plus the recording was horrible on the first video!! Sorry!) 
Table of Contents Toggle Cricut Design Space HelpDisclosure: This post contains affiliate links from Shareasale, Cricut, Awin, CreativeFabrica, and Amazon.com. I receive a small commission at no cost to you when you make a purchase using my links (purple text). As an Amazon Associate, I earn from qualifying purchases. If you need further instruction with Cricut’s software, you might find the previous Cricut design space help tutorials useful: Part 1: Cricut Design Space for Dummies – An Overview of Cricut Design SpacePart 2: All Things Font in Cricut Design Space – watch this video to find out where to get free fonts, how to upload, how to attach cursive letters, and much more in this tutorial. (click on the purple title!)Part 3: Accessing Extra Characters and Fonts to use in Cricut Design Space – learn how to easily access those secret glyphs to make your font stand out in CDS.Part 4: Making a Split Layer Monogram in CDS – learn how to design a basic split letter monogram and an ornate onePart 5: Using the Slice ToolPart 6: Using the Contour Tool to make layersPart 7: How to use the Offset tool
All of these videos and more tutorials are available on my YouTube channel. Make sure to hop over there and subscribe so you don’t miss any of the upcoming CDS tutorials. Tips for Using Write and Cut Cricut FunctionI will go over all of this in the video but wanted to give you a few screenshots of where things are first. As I mentioned, Cricut came out with a new update in 2021 that does not allow you to click on the button in your layers and change to write. If this doesn’t make sense to you, don’t worry, because you can’t do it anymore! Now, you have to access the DRAW function, not write on the top left of center. Under Operation, there is a dropdown that defaults to Basic Cut. Then depending on which Cricut machine you have selected, you’ll see CUT, DRAW (pen, foil, score, etc.) and Print then Cut. We will obviously be working with DRAW in this post. DRAW=WRITE 
Once you click on Pen, you’ll see the text turn to just outlines of a basic font that look like bubble letters. 
Most of the time we don’t want just outline fonts. Almost all system fonts you have on your computer are not single line fonts, which is what Cricut needs to write. To convert the outlines to a Cricut writing font, under the Style drop down click on Writing. Now you’ll see the single line of the font you had. 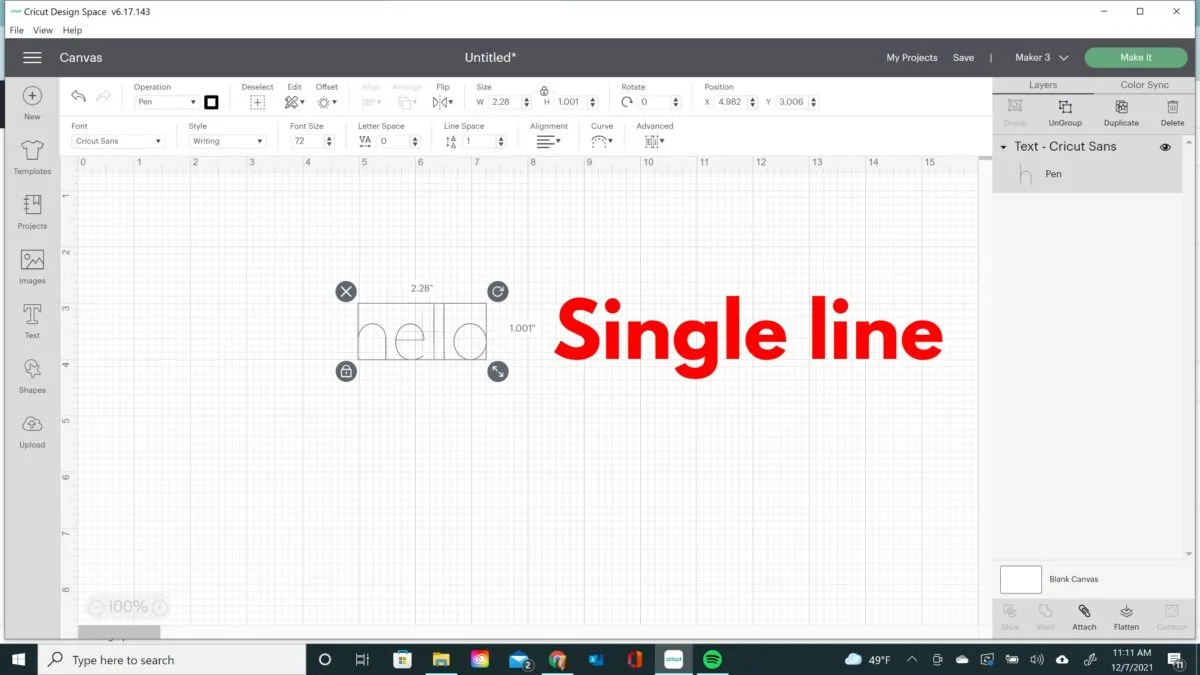
You can easily find the fonts specific for writing in Cricut Design Space (that you have with a Cricut Access subscription) by clicking on the filter in the Fonts drop down menu. Then click on Writing. Scroll through to see which different fonts you can use. 
You’ll notice if I only choose system font, that no writing fonts will show up. Again creating a writing font isn’t easy! I know because I created a free SVG file for you of a Thank You single writing font.  How to Draw and Cut on Cricut
So now let’s make a project using the draw function in Design space software. For this example of how to write with Cricut design space, I will be showing you how to add two different types of text to a tag. I found these dove tags under Images in CDS and inserted it onto a canvas. (This is from an older version of CDS so things might look slightly different). You can find Cricut fonts to use for writing if you filter the fonts when you are in the Fonts drop-down menu. When you click on Filter, select Writing. 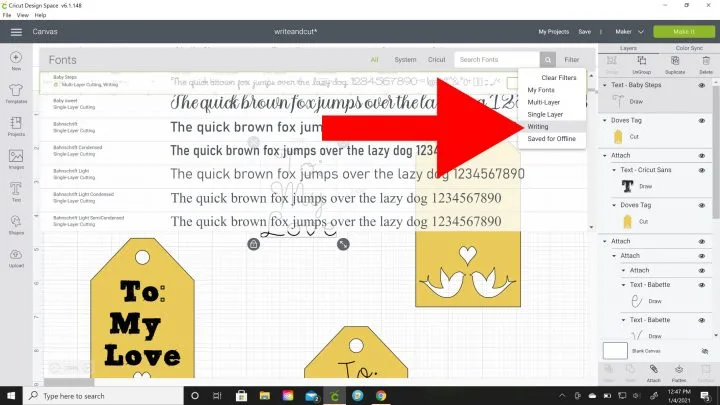
Then after you type text into a text box click on the Style drop down and select Writing or click on Operation and select Draw. You can do either to change Cricut from cut to draw. 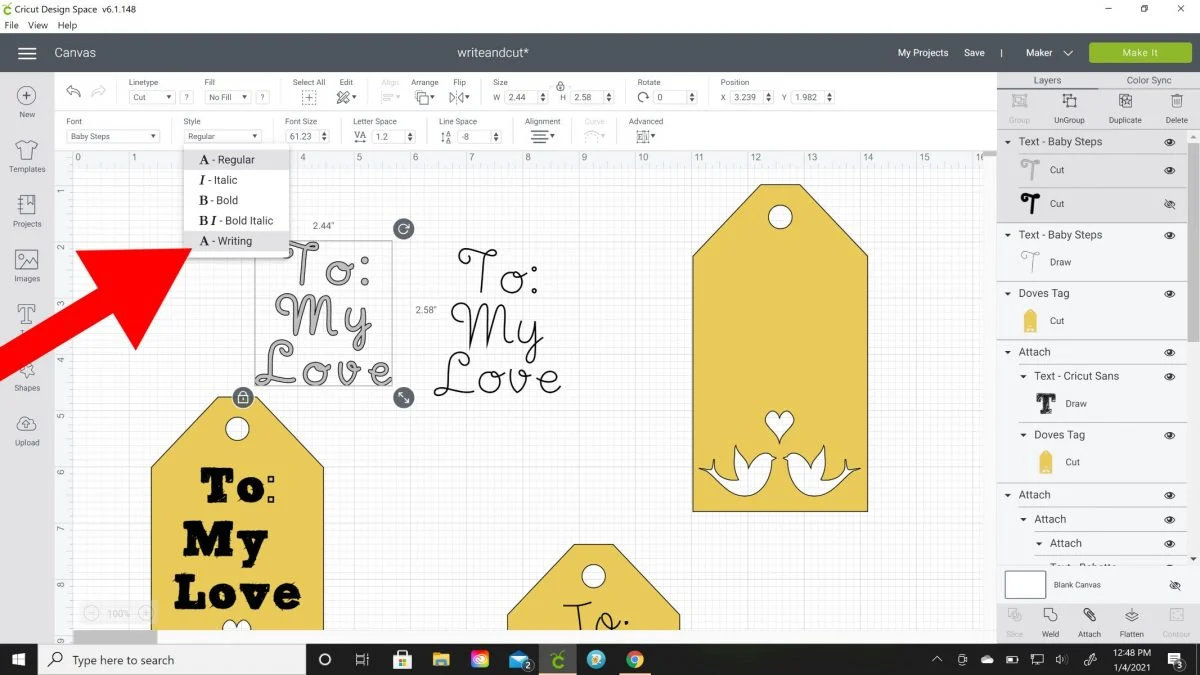
Once you do either of those actions, you’ll notice the text changes to a skinny writing font and the word under Linetype is now Draw. 
With your text block selected, click on the Square next to the word Draw and change the type of pen and color you want to use. All of the types of Cricut markers and pens (including Infusible Ink pens, gel pens, extra fine point, calligraphy pens) will appear along with all of the different colors of each. 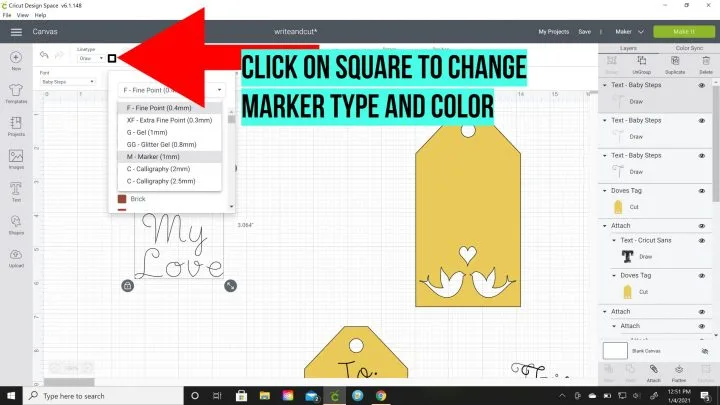
This is just so the Cricut can tell you exactly which color to insert when. (You can always change your mind on the pen, the Cricut can’t actually tell which one you insert!) I decreased the line space and aligned the text to fit over the tag how I wanted it. Now that we have the font how we want it, you’ll need to attach it to whatever you want it to draw on. Use your cursor to put a box around the tag and font, and click the attach button. 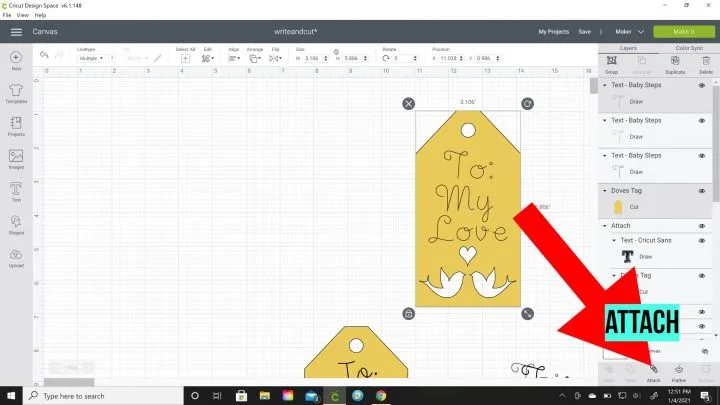

Then you’ll see in your layers panel, an attached group that has a draw and a cut.  How to Draw a Thick Font with a Cricut
As I mentioned before, a Cricut will only draw or write the outlines of letters unless they are a single line type. But there is a way to get around that and that is to use fonts that are colored in or sketch fonts. I used dafont.com and typed “sketch” in the search bar. You’ll notice a bunch of different font styles come up that look like they are hand-drawn and colored in. This is what we need! We want the Cricut to draw all of those small lines. 
I chose Sketch Block and clicked on Download. Make sure to check out my tutorial on uploading fonts to use in Cricut if you need more help with this step. 
Make sure to refresh CDS if you just installed the font and had the app open so it will show up. I always use the search box. I typed in sketch to find the sketch block font and selected it. 
Then make sure to turn the words from Cut to Draw by selecting Draw under the Linetype drop-down menu. 
So now when I select that font in CDS and attach it to the tag, my Cricut will color the letters in with the write function.  How to Change from Cut to Draw on Cricut App
Changing from cut to write or draw on the Cricut app is a little bit different but still easy! When you click on Text in the lower left hand corner you will find the filter icon on the top right of the pop up window. 
Then choose Has Writing Style. 
Select a font and type whatever you want in the text box. Then while the text is selected (click on it so a rectangle appears around it) click on Edit. Then another tool bar will pop up. Now to change the font from cut to draw on the Cricut mobile app, Click on Style then Writing. 
The text will change from cut to draw and turn skinny. Now you can click on the Draw circle in the lower right of the Cricut app to change the pen/marker style and color. 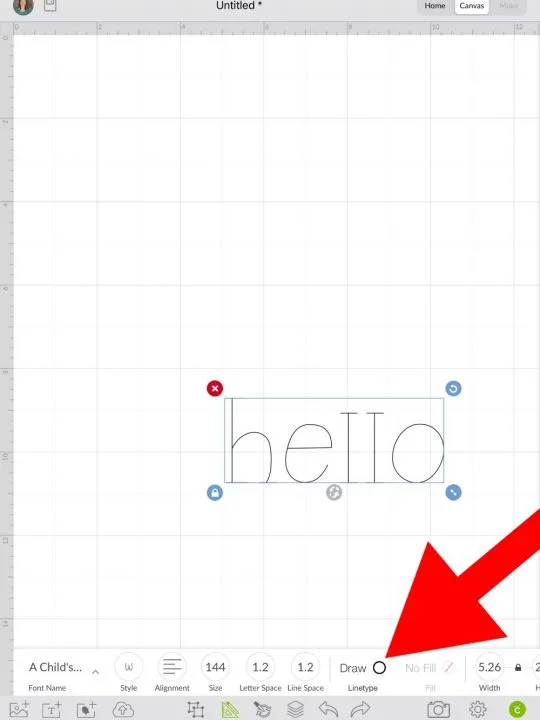

That’s all there is to using write and cut on the Cricut app. If you are using a tablet or iPad, make sure to check out my tutorials on how to curve text and how to download fonts on the iPad. How to Write with CricutNow that you have everything changed to write and attached it’s time for your machine to do the rest! When you click Make It, and set your material, the Cricut will prompt you to insert a pen with the Cricut pen colors you selected. Simply open the clasp of clamp A, insert the pen until you hear it click, and close the clamp. 

You also do not have to only use the Cricut pens. There are a ton of other pens that work with the Cricut. Check out Fields of Heather post on alternative markers for Cricut. The Cricut will first draw with the inserted pen and then will cut out the tag. You can use the draw function on so many materials, I even used it on a leather journal using a Sharpie. Write and Cut Cricut Video TutorialSo these are the two different tags I will be showing you how I made in the video tutorial. 

Please let me know if you have any questions after you watch the video at the top or side of the post about the writing feature (it moves around!). Make sure to turn on your volume to listen to the explanations. Continue to Content How to Write with Cricut
Yield:
1 tag
Active Time:
5 minutes
Total Time:
5 minutes
Difficulty:
Beginner
Estimated Cost:
$0
How to Write with Cricut
Yield:
1 tag
Active Time:
5 minutes
Total Time:
5 minutes
Difficulty:
Beginner
Estimated Cost:
$0
Learn how to write with Cricut to make unique cards, tags, and signs! Materials Cricut marker or pen Cardstock Tools Cricut cutting machine Instructions In Cricut Design Space, click on Text. Write the text you want in the text box.Under the drop down Basic Cut, change to Draw and Pen. Click on the box next to pen and select which Cricut pen and color you are using.To find Cricut writing fonts, filter the Font drop down menu to Writing.Or from the canvas, click on Style and select Writing.Insert a shape or tag that you want the writing on.Center the text over the tag. Select all and Click Attach.Follow all of the Cricut Design Space prompts to insert your pen and to swap to the fine point blade when needed. NotesSee post for full step by step instructions. Recommended ProductsAs an Amazon Associate and member of other affiliate programs, I earn from qualifying purchases.  Cricut Maker, Champagne
Did you make this project?
Cricut Maker, Champagne
Did you make this project?
Please leave a comment on the blog or share a photo on Instagram © Amy Project Type: Cricut / Category: Cricut Design Space Tutorials
If you’d like to save this tutorial on how to write with a Cricut for later, hover over the top left of the image below and PIN IT. Thanks! 
Have a creative day!  Related Posts:
 Cricut Design Space Tutorial: Write and Cut Cricut Design Space Tutorial: Write and Cut Cricut Design Space for Dummies: How to Get Started with CDS Cricut Design Space for Dummies: How to Get Started with CDS Cricut Design Space Split Image Video Tutorial Cricut Design Space Split Image Video Tutorial Make Your Own Banner With Chalk Markers and a Cricut!
Facebook
Email
Print Make Your Own Banner With Chalk Markers and a Cricut!
Facebook
Email
Print
|
【本文地址】